 Ok! so how have you been going preparing your pages, hope I have encouraged some of you reading my blog in having a go, because now comes the fun stuff, really I am getting as much fun making these journals as I am hoping my grand daughters will have fun using them. I am giving you the 3 stages of this one page to save you scrolling up and down to see the differences, above is the page with just the masking tape joining 2 pages together. My tools I have used are gesso, Pitt Brush Pens, fine line pen, stamps and scrap paper, other things you could consider are water colour crayons (you will need to put a sealer over the crayons, I use matt gel medium. I also use the gel medium to take the shine off the magazine images).
 This one is after I have added gesso.
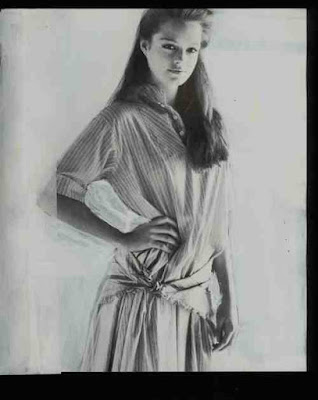
 And the finished pages waiting for the recipient to add script or more doodling. On the left of the page cut out from a teens magazine, cutting away all the background. Glue down with glue stick, glue a piece of scrap paper across bottom, great way to use up your scrap paper. Using a 8B graphite pencil draw around the edges where you would have shadows then smudge with a rubbing pencil (one of those firm rubber shaped like a pencil with a point on each end. These are really great for making shadows. On the right page using Pitt brush pens draw lines down from the figure every 2nd one draw stripes in two different colours and draw dots in the other space. Using a fine line black pen out line each stripe to define.
 All that I have done with these pages is to write a quote on this one with a black fine line pen.
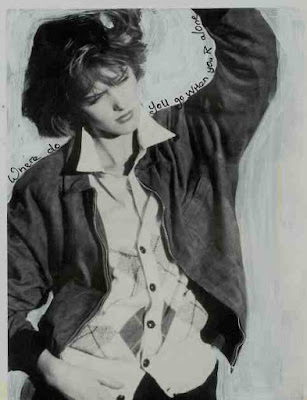 And this one a prompt for the recipient to continue with.
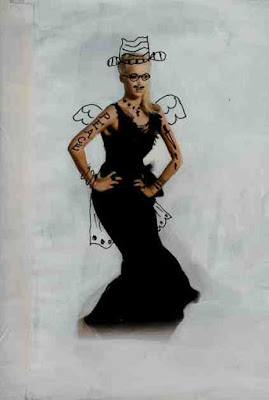 With your black fine line pen, go for it, tats, wings, extra skirt, bangles and a hat, get the idea, so much fun I think she looks much more interesting now, journal ling can be added into all the white spaces. Golden gesso is a good substrate for your pen
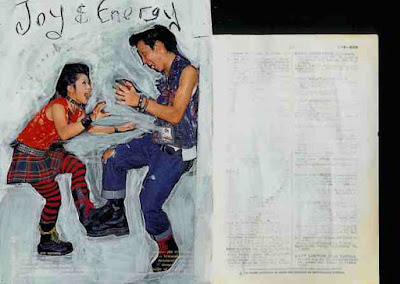
 Remember this fun couple with fine line pen give them some movement and words coming out of their mouths and on the right I have used a prompt from Sabrina Ward Harrison's books, my favourite. Another scrap of paper on the bottom.
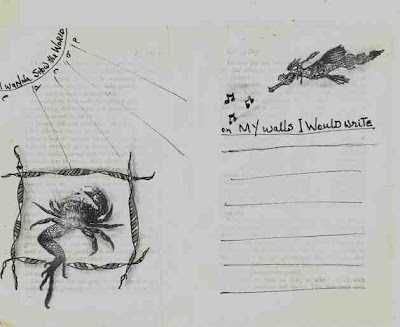 Use your favourite stamps mine are Nick Bantock (so quirky) using Pitt brush pens make a ribbon border around the crab and shade with graphite pencil and smudge, SWH prompts to get your ideas flowing. I used the black India Ink stamp pad as I find it nice and juicy.
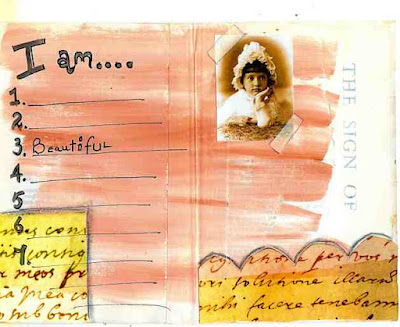 Add scraps of paper one on right I have scalloped the edges and shaded. SWH prompts, a coloured photo with snips of masking tape on corners.
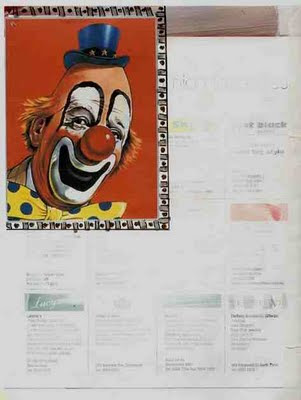 This one a clip art clown with a border done with Pitt brush pens (one of my favourite tools).
Well that gives you some ideas the hardest part is knowing when to stop, and remembering its a gift for someone else, you just want to give them some ideas on creating their pages, way too much fun. In the one journal I have finished I have got 42 pages or 21 double pages. Will give you some time to catch up. Well that was a mammoth entry for me.
Have fun
Jacky
 This one is painted just with gesso, can you see the script through the gesso
 remember this fun one, gesso around the figures, then while gesso is wet use the other end of your paint brush to write some words or patterns. Page on the right is the one I ripped and I glued another page on top. Stronger page.
 Page out of bridal magazine, these pages are very shiny and paint doesn't want to adhere to it but the gesso is fine.
 Did you notice this image with all its dark background, whiten out with gesso and she floats with her wings spread out. This will give you plenty of options for next stage.
 This page is one of the bigger pages and I have only scanned one side. This page is out of the vogue book, I really like these, the pages aren't shiny and seem to take the gesso better, doesn't she stand out on the page.

 These pages from the voque book, nice sturdy pages, join your pages together with wide 3 1/2 cm wide masking tape (the one I am using is smoother than some, when I join 2 pages together I leave just a little gap.
  These are pages from old books, nice and sturdy, I like to separate the ones with images with these pages.
 These are the amazing pictures out of the freshfruit magazine, just wait and see how these come out after further treatment.
 This was way too much fun, as you can see I don't have a very straight eye, practise will be needed here.
 Love the doodling, you can do it while watching television too.
 I would recommend anyone who cannot get to classes the online classes are a good way to try different techniques. I had trouble with the videos, they took over half an hour to download and then when trying to view would only go so far, stop then go back to the beginning, I gave up in the end, I am afraid I don't have a lot of patience with computers, a love/hate relationship, have nearly sent it flying out the door on several occasions. The workshop I did was Pam Carikker's Shades of Grey.